How to contribute
This paper will show users how to participate in the contribution of the AppStore project, which is divided into two parts, which will separately describe how to build the local development environment and the operating guidance of the AppStore.
Building local development environment-Release 1.1
This section will guide users on how to build the AppStore-be and AppStore-fe modules locally, helping developers to quickly understand and develop code.
AppStore-be’s local activation depends on:
- Service center
- DataBase
- User Management
AppStore-fe’s local startup relies on:
- Website Gateway
- User Management
- AppStore-be
So to build a local development environment, the final start sequence is Service Center -> DataBase -> User Management -> AppStore-be -> Website Gateway (AppStore-fe)
Service Center
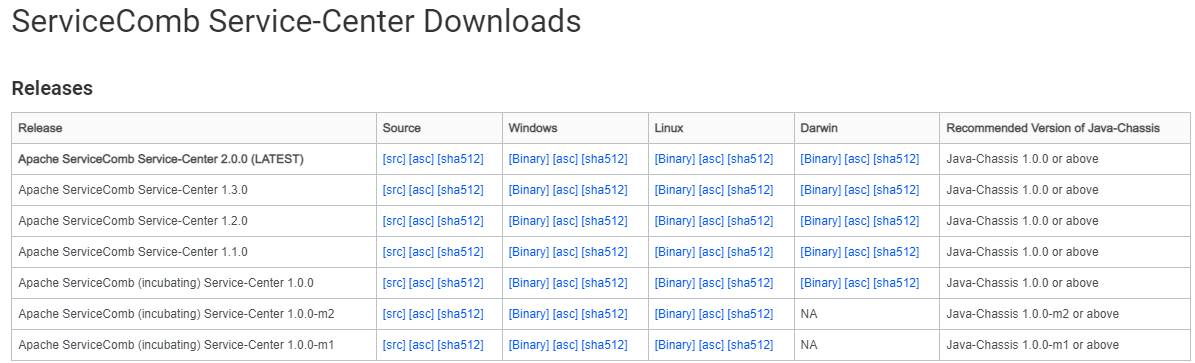
1.Download Service Center
!
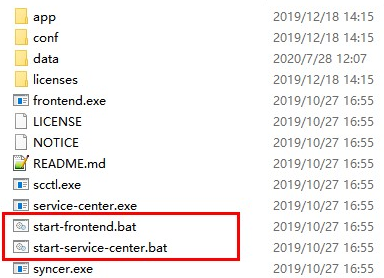
2.Run the start-service-center.bat and start-frontend.bat after decompression
DataBase
1.Download, install and start Postgresql 12.3
2.setting the login name and password, such as postgresql/root
3.Create a database called appstoredb
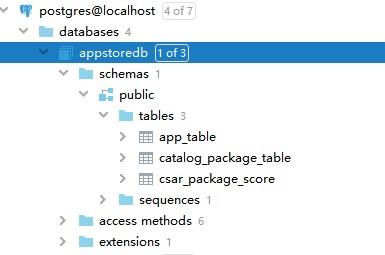
4.Create a database called usermgmtdb
User Management
1.Download user-mgmt-be code and user-mgmt-fe code
2.Install node.js and npm, enter the user-mgmt-fe folder, and run npm install and npm run build
3.Create a static folder in the src/main/resources/ folder of user-mgmt-be
4.Copy the contents of the dist folder compiled by user-mgmt-fe to the static folder of user-mgmt-be
5.Configure the runtime environment variables of MainServer in the compiler (here, taking IDEA as an example)
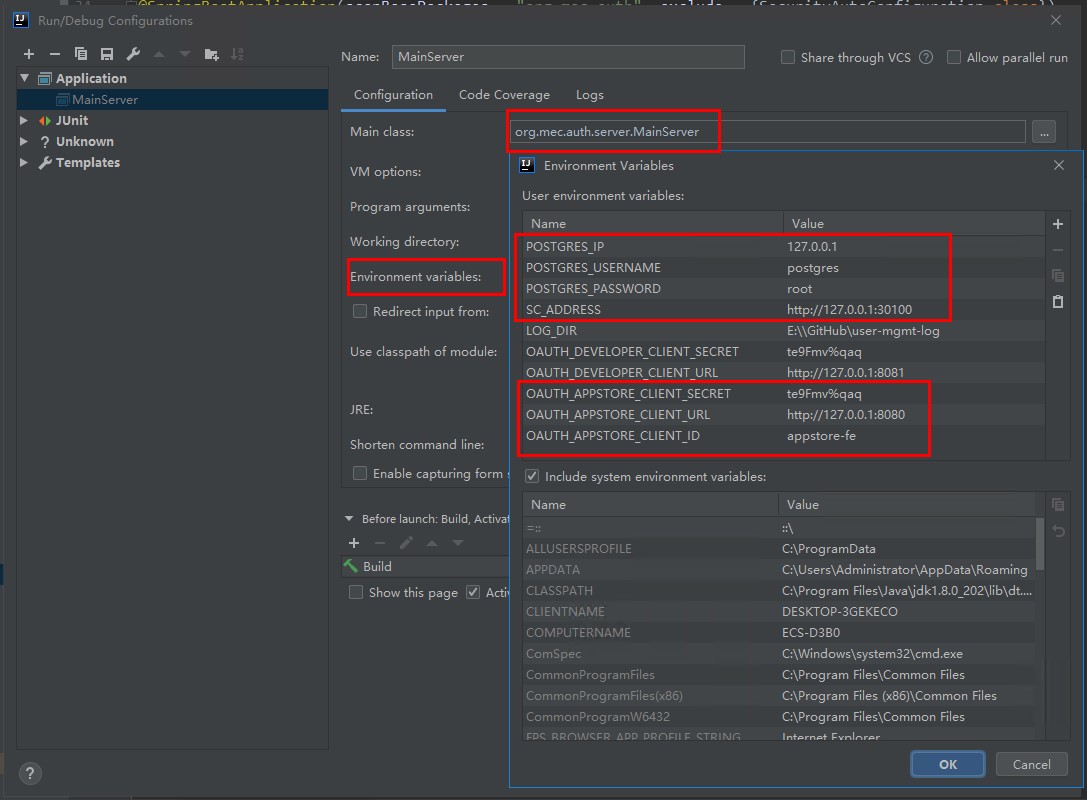
6.Run the MainServer function and start UserManagement
AppStore-be
1.Download the appstore-be code
2.Modify servicecomb.rest.address to 127.0.0.1:8099 in appstore-be in /src/main/resources/application.yaml document
3.Configure runtime environment variables for MainServer in the compiler (where IDEA is used as an example)
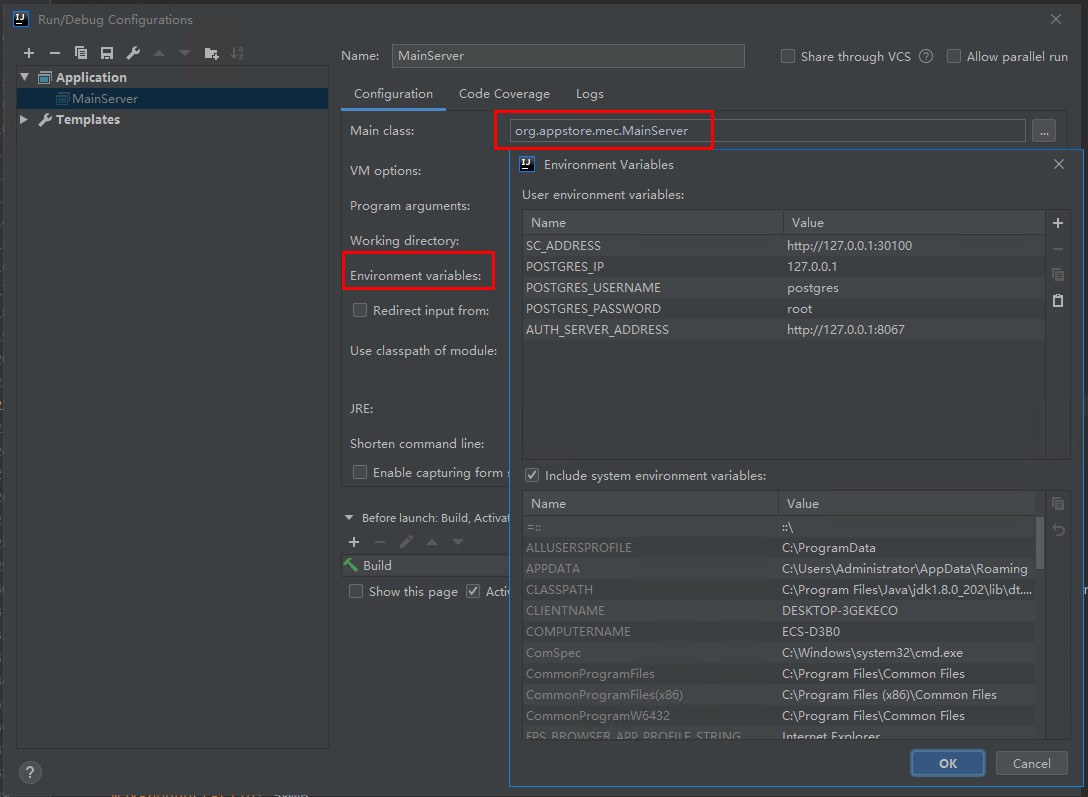
4.Run the MainServer function and start appstore-be
AppStore-fe
1.Download appstore-fe code
2.Enter appstore-fe folder, run npm install and npm run build
3.Download the website-gateway code
4.Create a static folder in the src/main/resources/ folder on website-gateway
5.Copy the content in the dist folder compiled by appstore-fe to the static folder of website-gateway
6.Modify server.port in the /src/main/resources/application.yaml document in the website-gateway 8080 (the port in the OAUTH_APPSTORE_CLIENT_URL variable that is completed at startup of usermgmt) is consistent)
7.Configuring runtime environment variables for GatewayApplication in compiler (here, IDEA as an example)
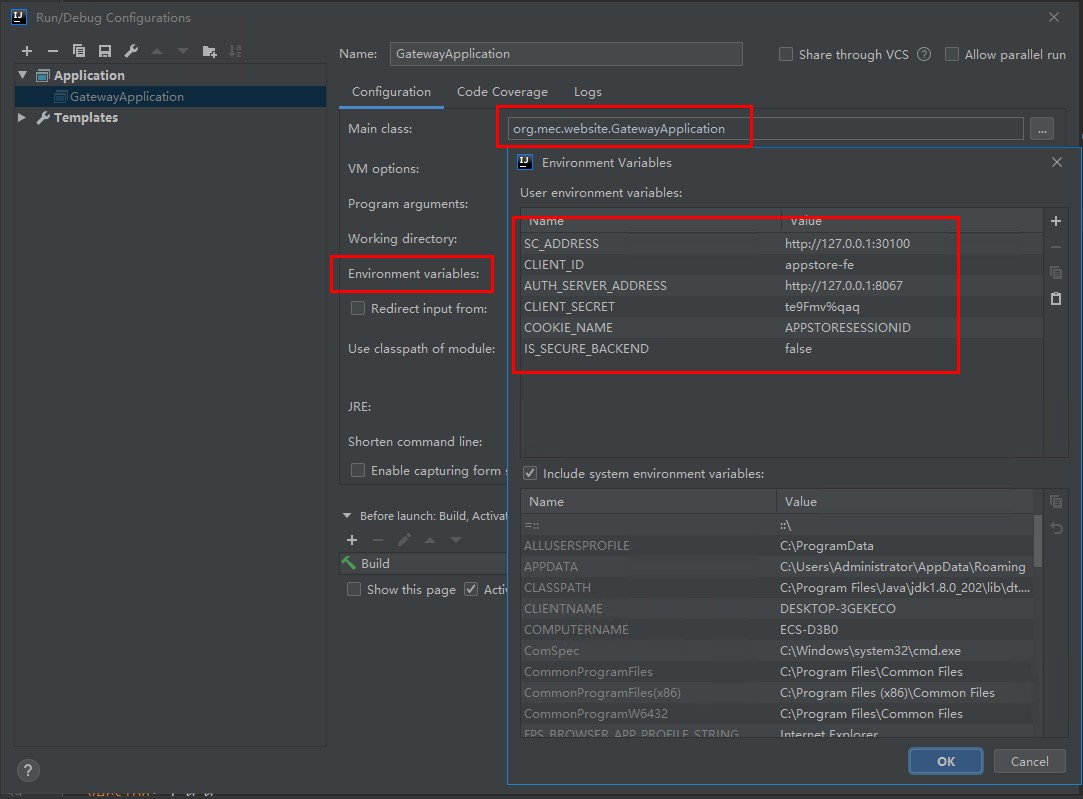
8.Run GatewayApplication to launch WebiteGateway with AppStore-fe, browser access to http://127.0.0.1:8080/ to access the AppStore homepage
Operating guidance
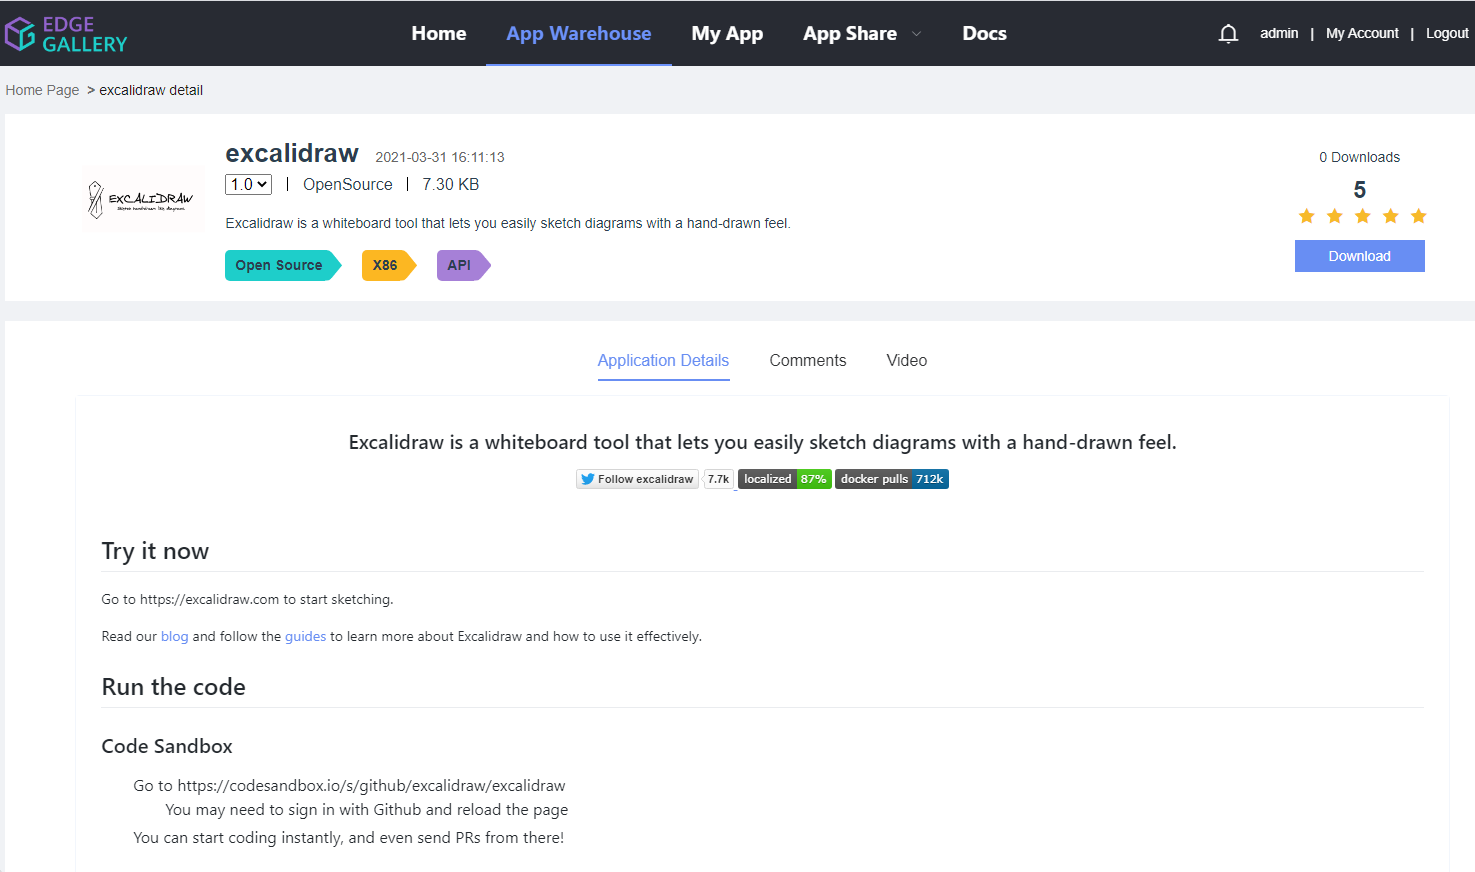
AppStore is a market for developers publishing and onboarding App applications, edge applications developed by Developer Platform and tested can be shared directly to the AppStore app store.It is also possible to directly upload an application package that conforms to the platform specification and the application package document type is csr. One APP corresponds to multiple packages, the user can download the latest version of the APP directly or download the specified version of Package.
Register application platform
After entering the network address, the default is the guest user which can look at the information. To do more (such as uploading an application) is also required to register an account, register complete and enter the application platform home page: 


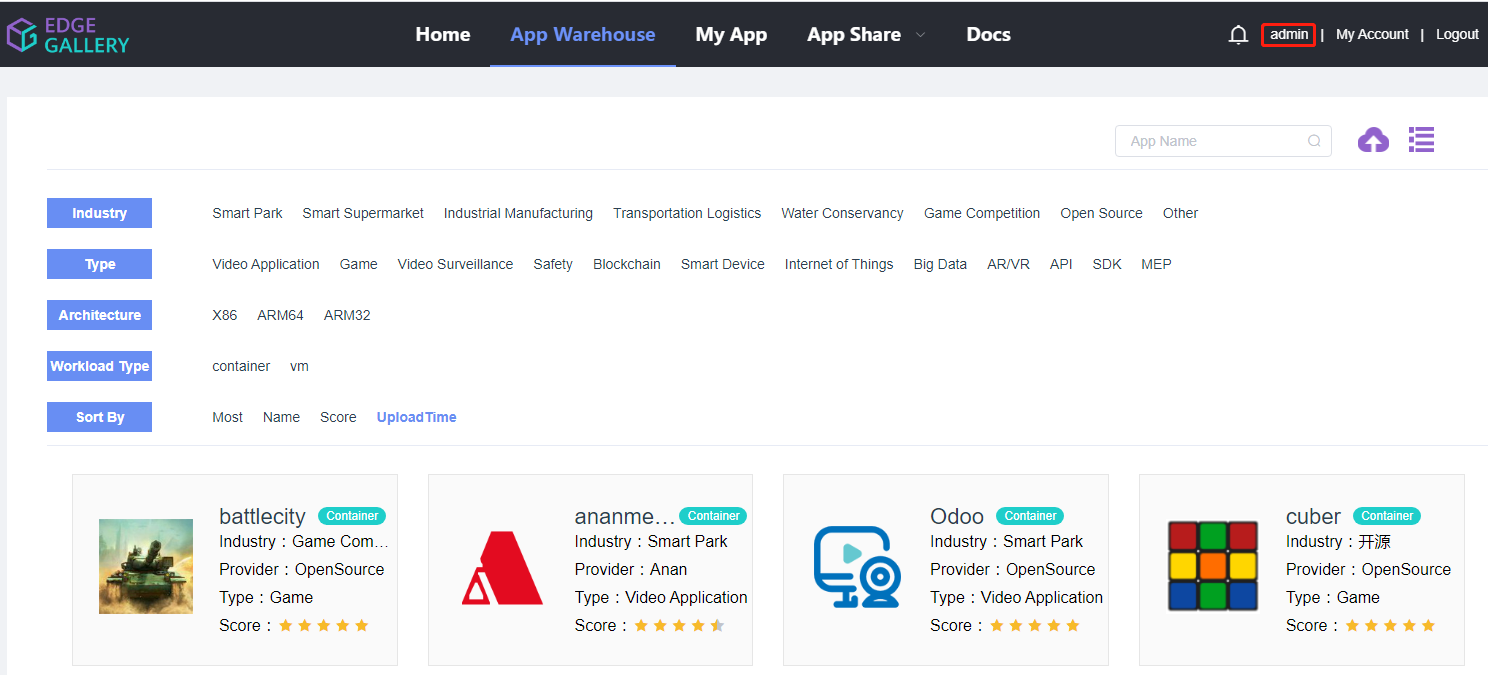
See the app
The right side operation in the basic information can only download the packet uploaded by itself. The administrator user can download all the published bags and the uploaded bags.
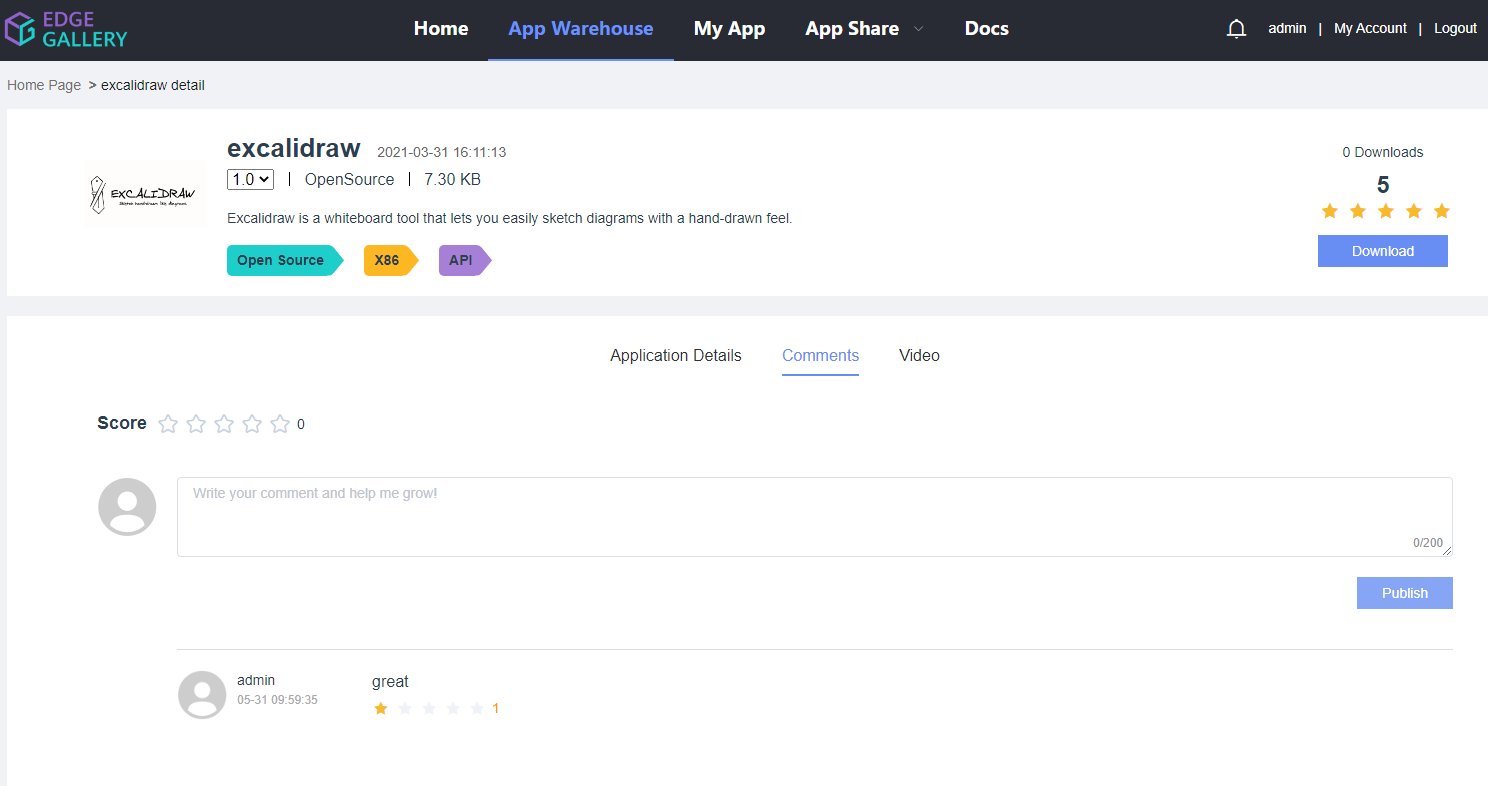
For comment on APP, the comment can be submitted successfully after commenting on the comment area, setting the score and the mouse’s left click button.

Publish application
1.Upload APP, open APP Store Main Interface, tap to right upload icon, open upload APP dialog box. Selecting APP industry, type, framework, filling in APP simple description and clicking confirm to finish uploading. 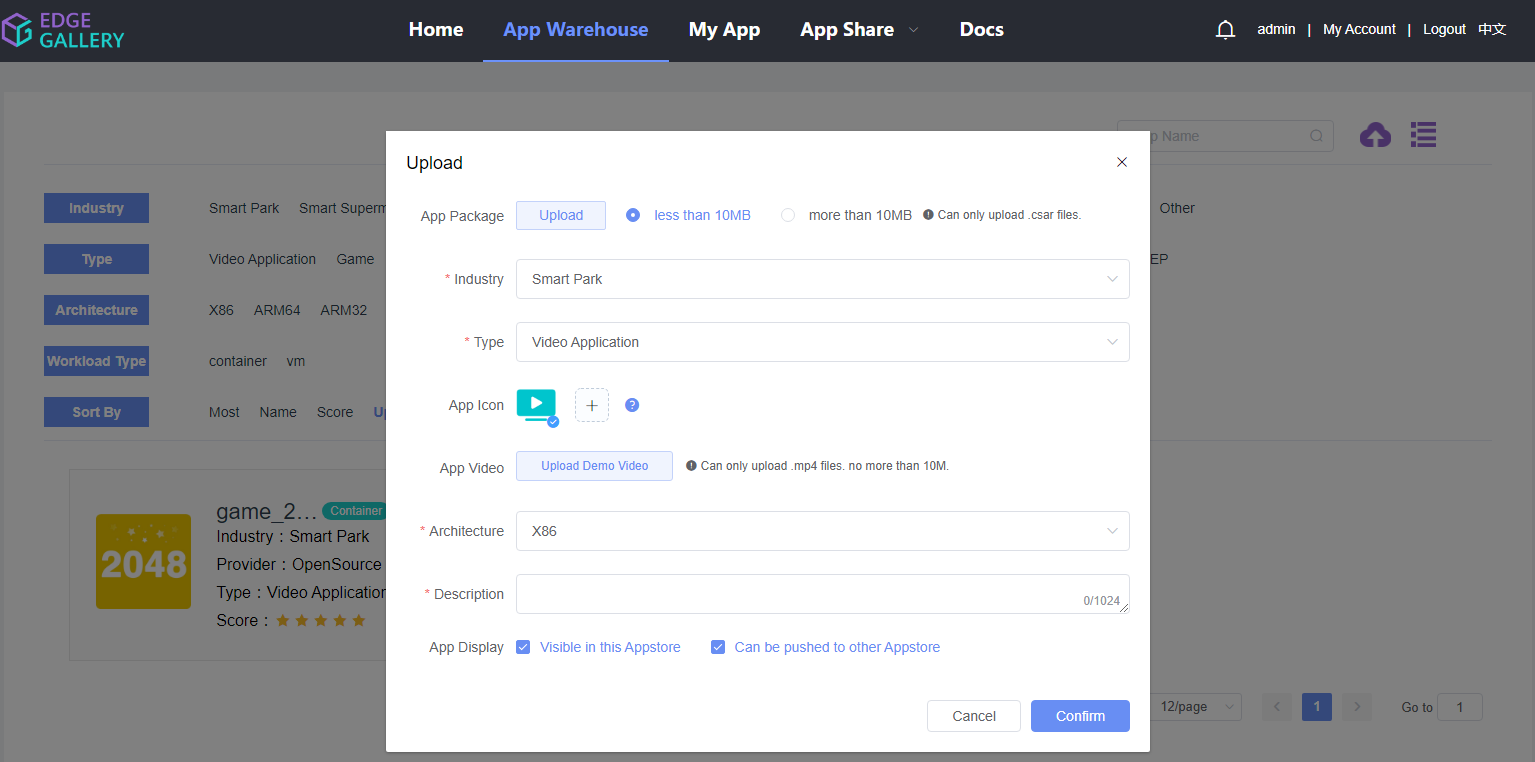
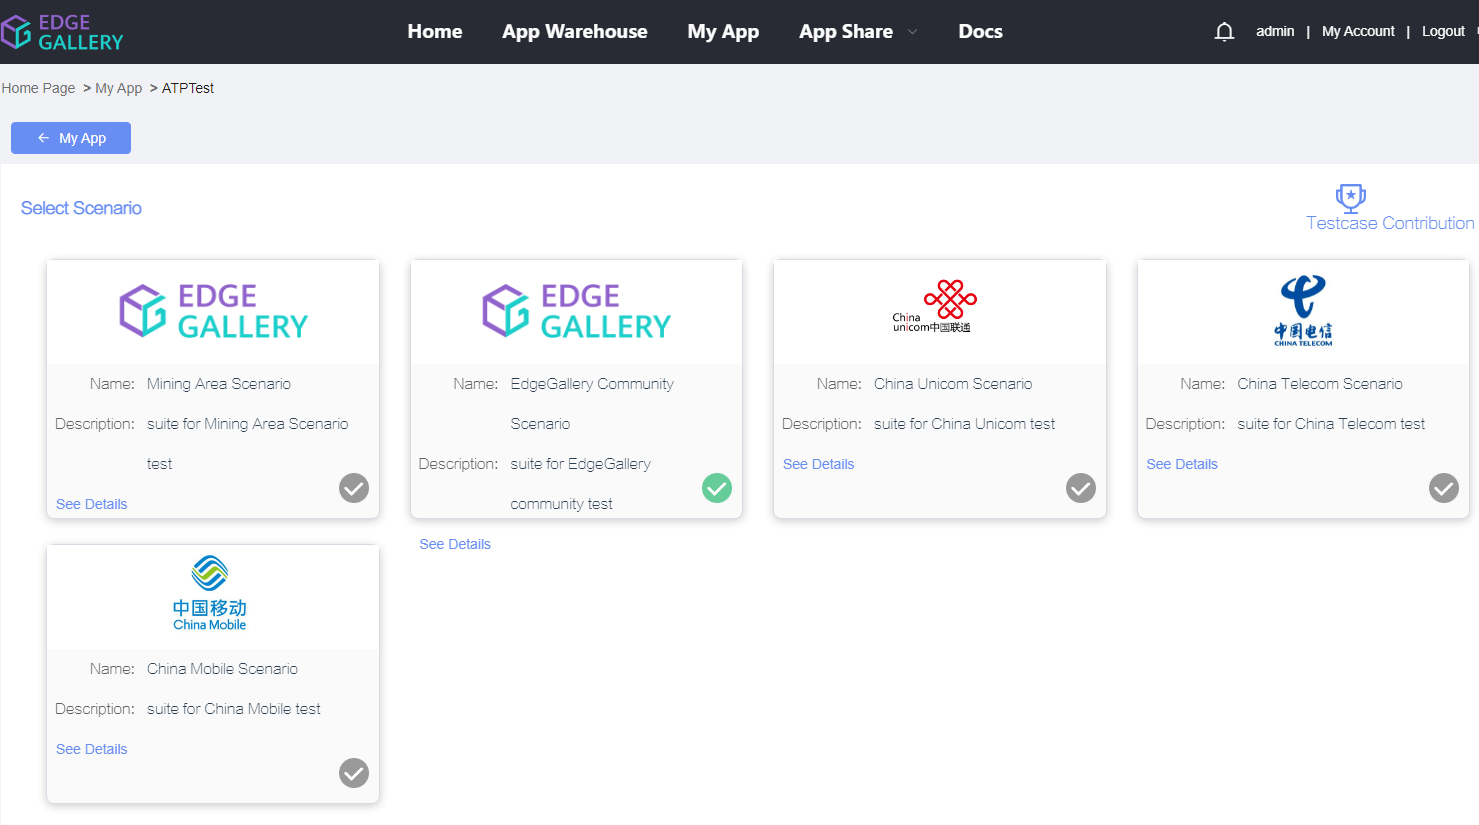
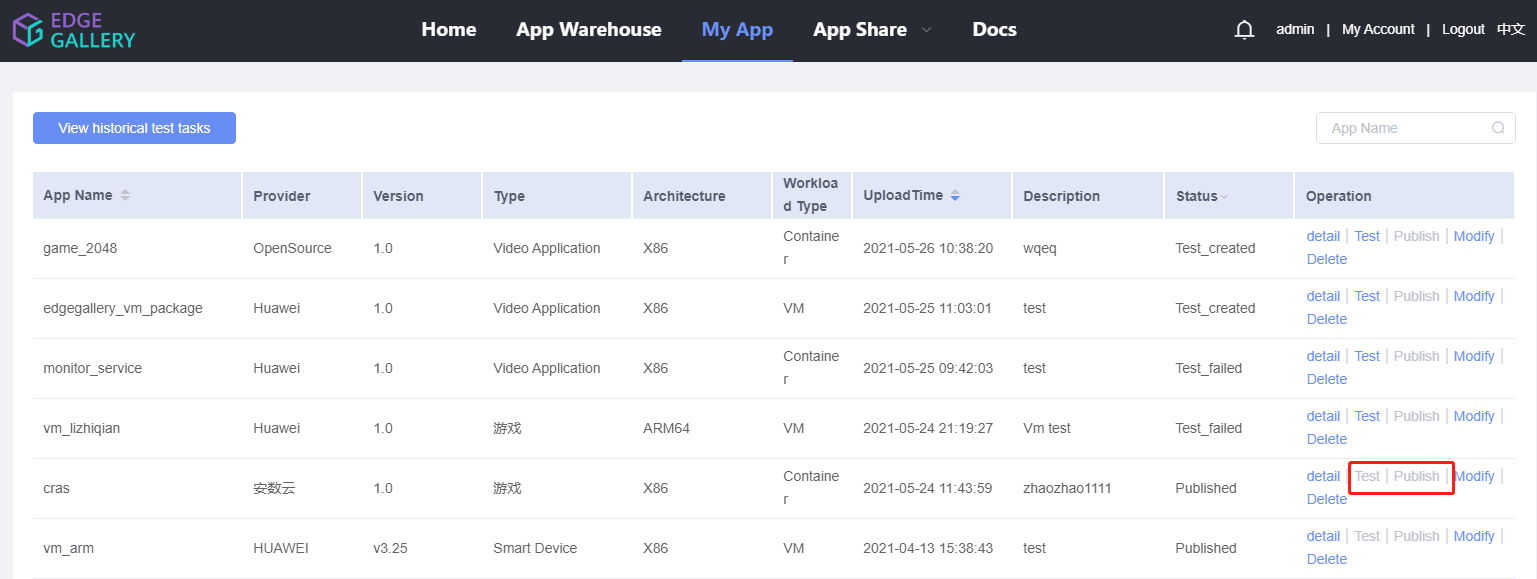
2.After the application is uploaded, it automatically jumps to my application interface and the uploaded application needs to be tested after a platform at the atp test before it can be published to the warehouse. My application is the basic information of the uploaded package, the right side of the table is a basic operation, the click test button starts to create the test task, the page is a nested atp test page, the click start test button, the click start test, and the test progress page, the page is the test progress page, you can return to my application page, wait for the test to complete 

3.When the test status in my application is Test_success, which is a test success, you can publish the app, tap the release button on the right, and post a success, and you can see the app you uploaded on the home page. 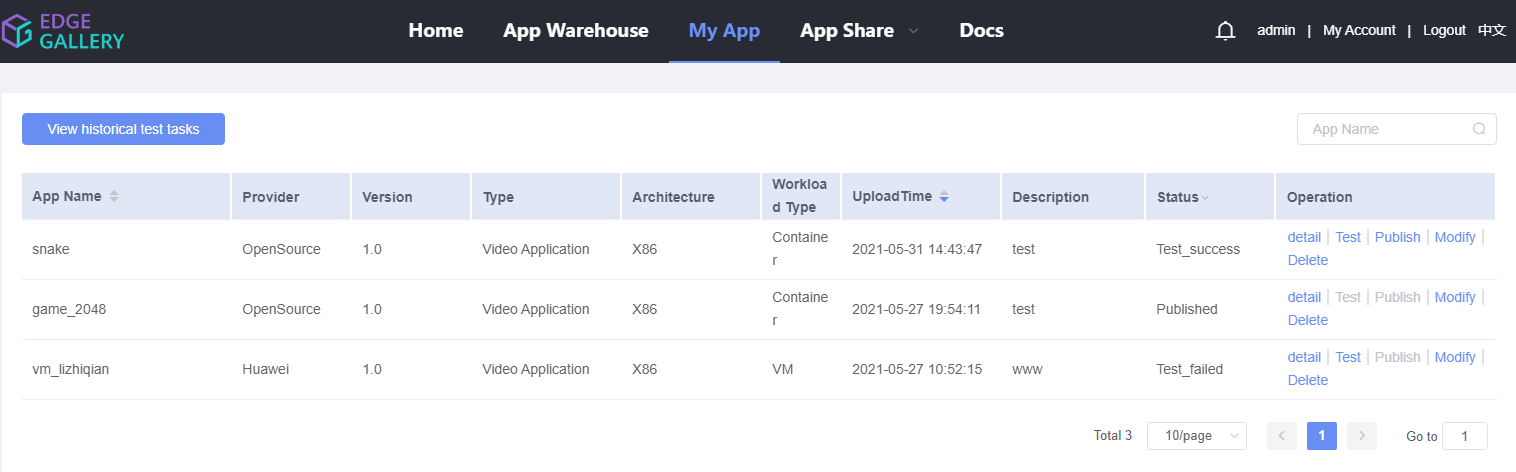
Shared applications
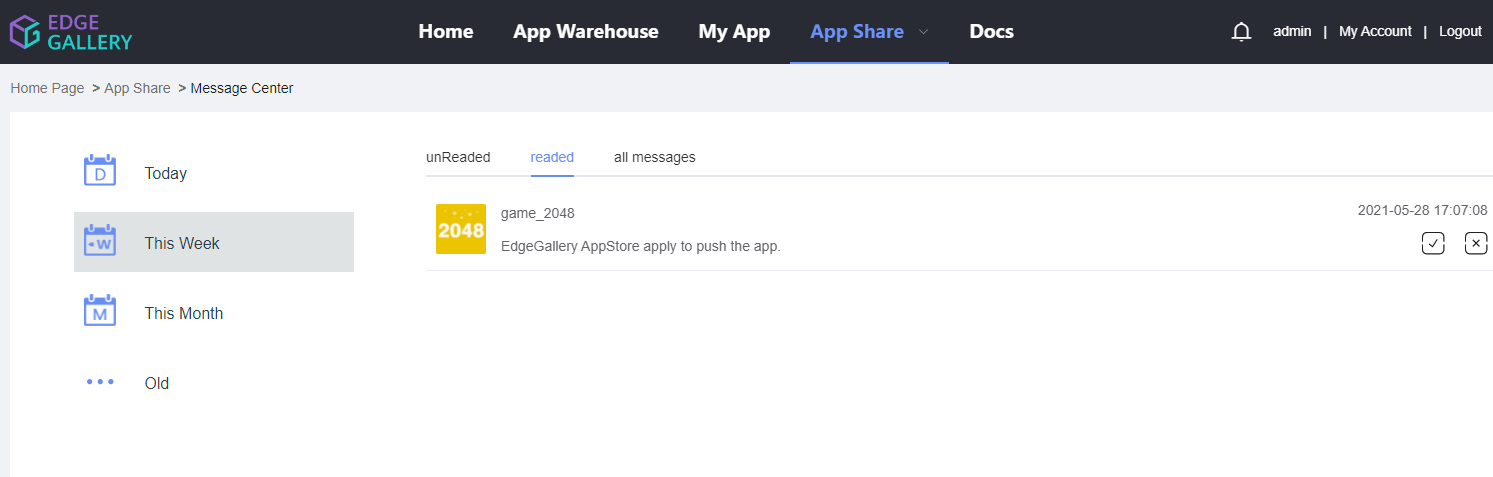
1.Application sharing navigation is divided into external application warehouse management, application promotion, application pull, message center and operation analysis. 
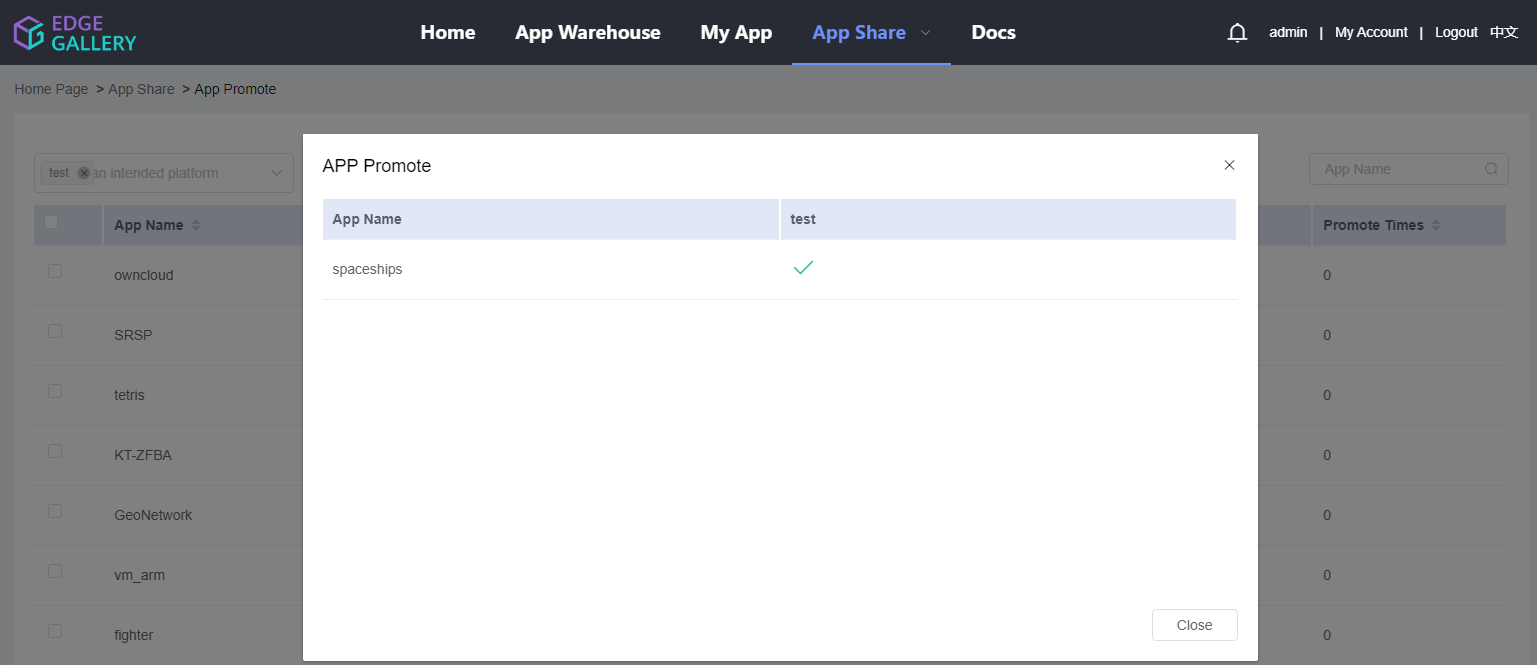
3.Clicking the application push menu under the shared main menu to see the push application information, selecting the application needing to push to the operator or the third party to open the application push operation dialog box.Hit the button on the bottom left of the push action dialog box, trigger the push task, and see the results of the application push to the operator or third party. 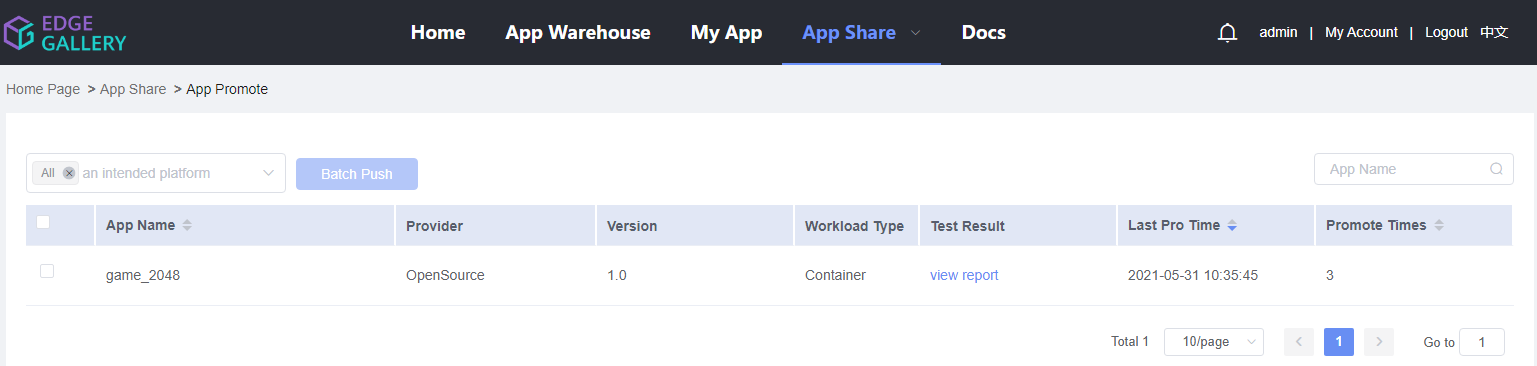
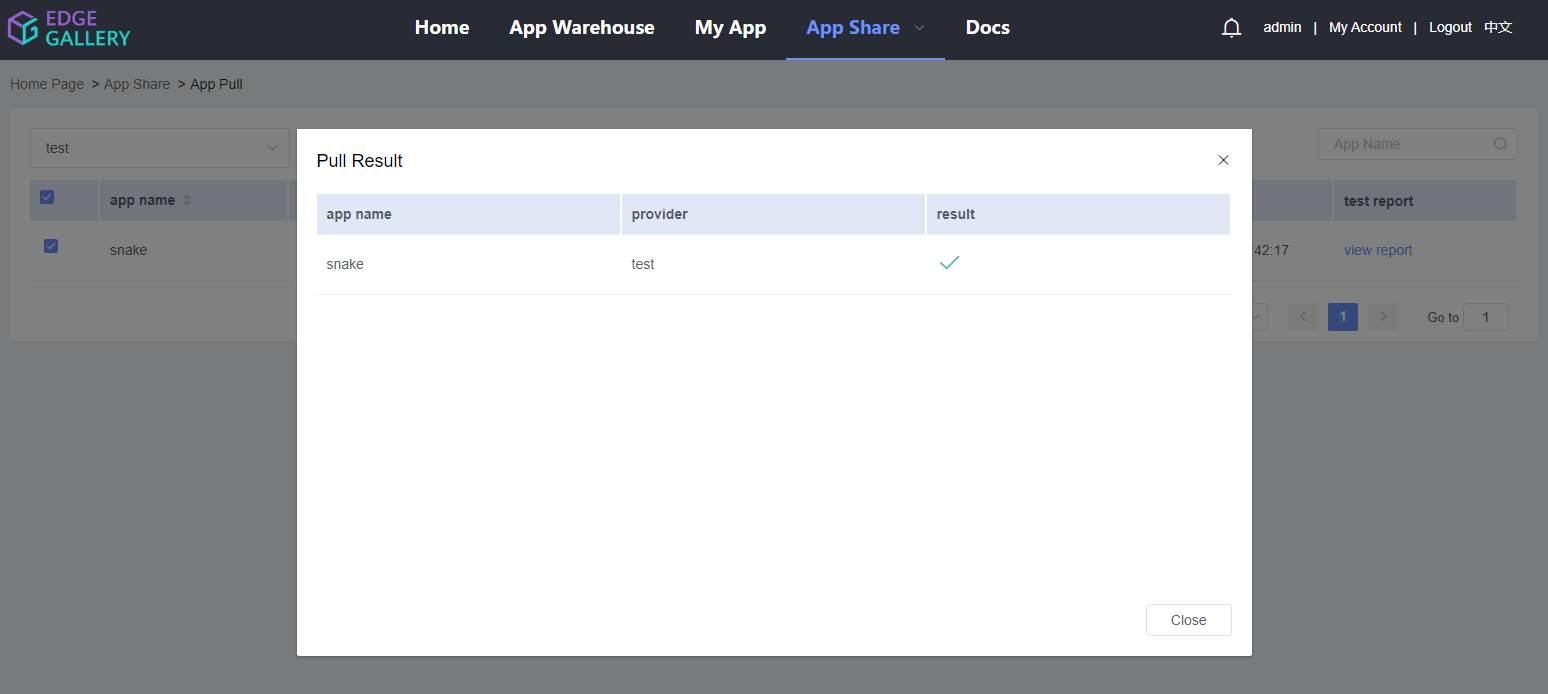
4.Clicking the application drawing menu under the application sharing main menu to look at the application information that can be pulled by each external warehouse; selecting the application needing to be pulled to carry out batch. 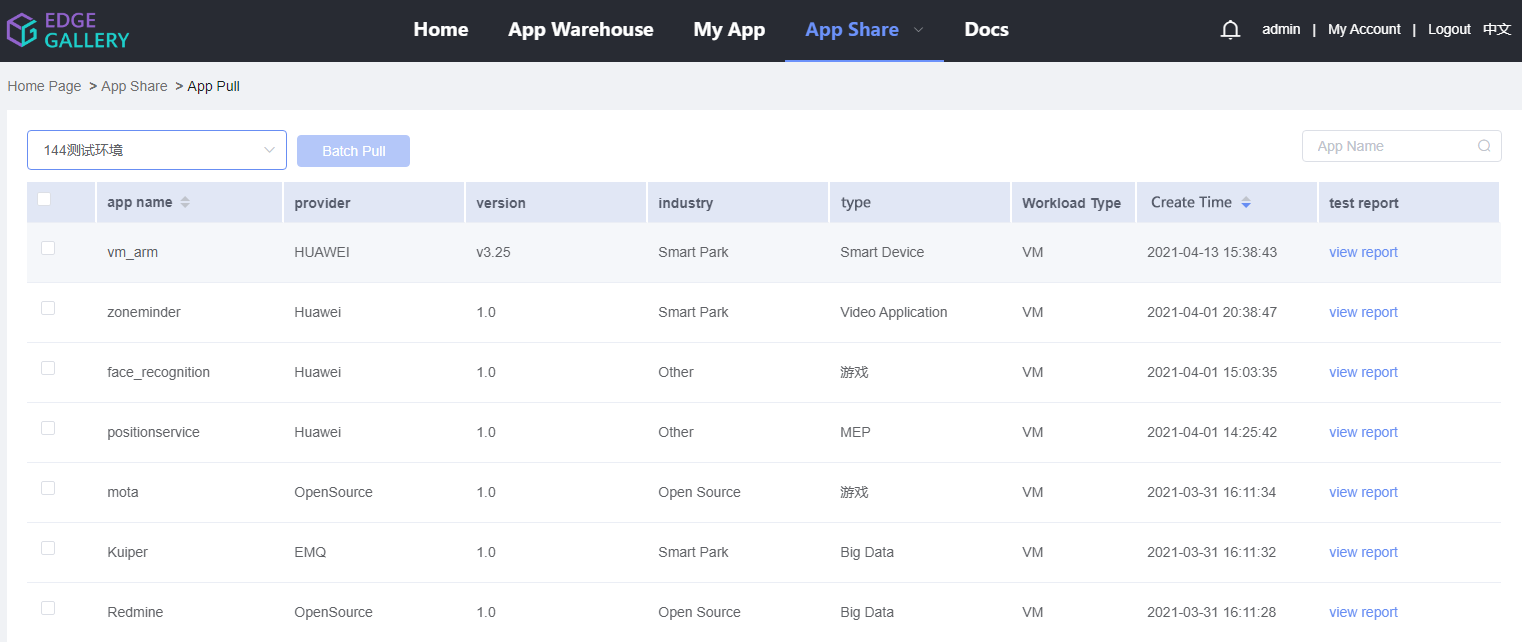
5.Clicking the information centre menu under the shared main menu under application, and checking the notification information and accepting the APP information from different operators needing to push. By clicking the receiving button in the upper right corner of the right side panel of the message centre, the information of the application can be pulled (download), the successful APP can be looked at the “My Application” interface, and the click delete button deletes the message. 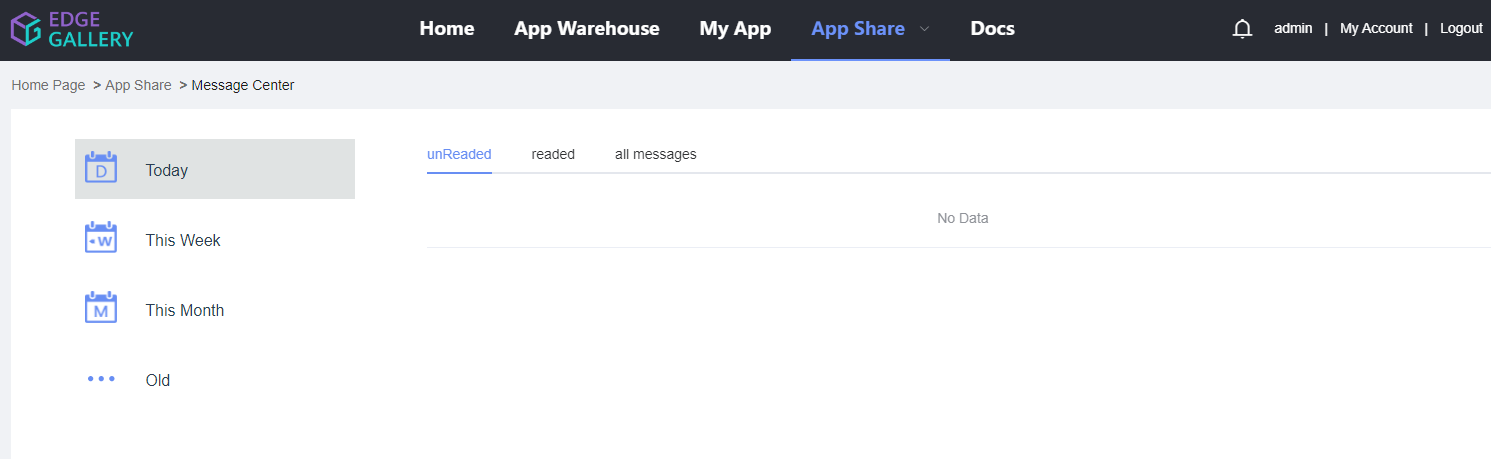
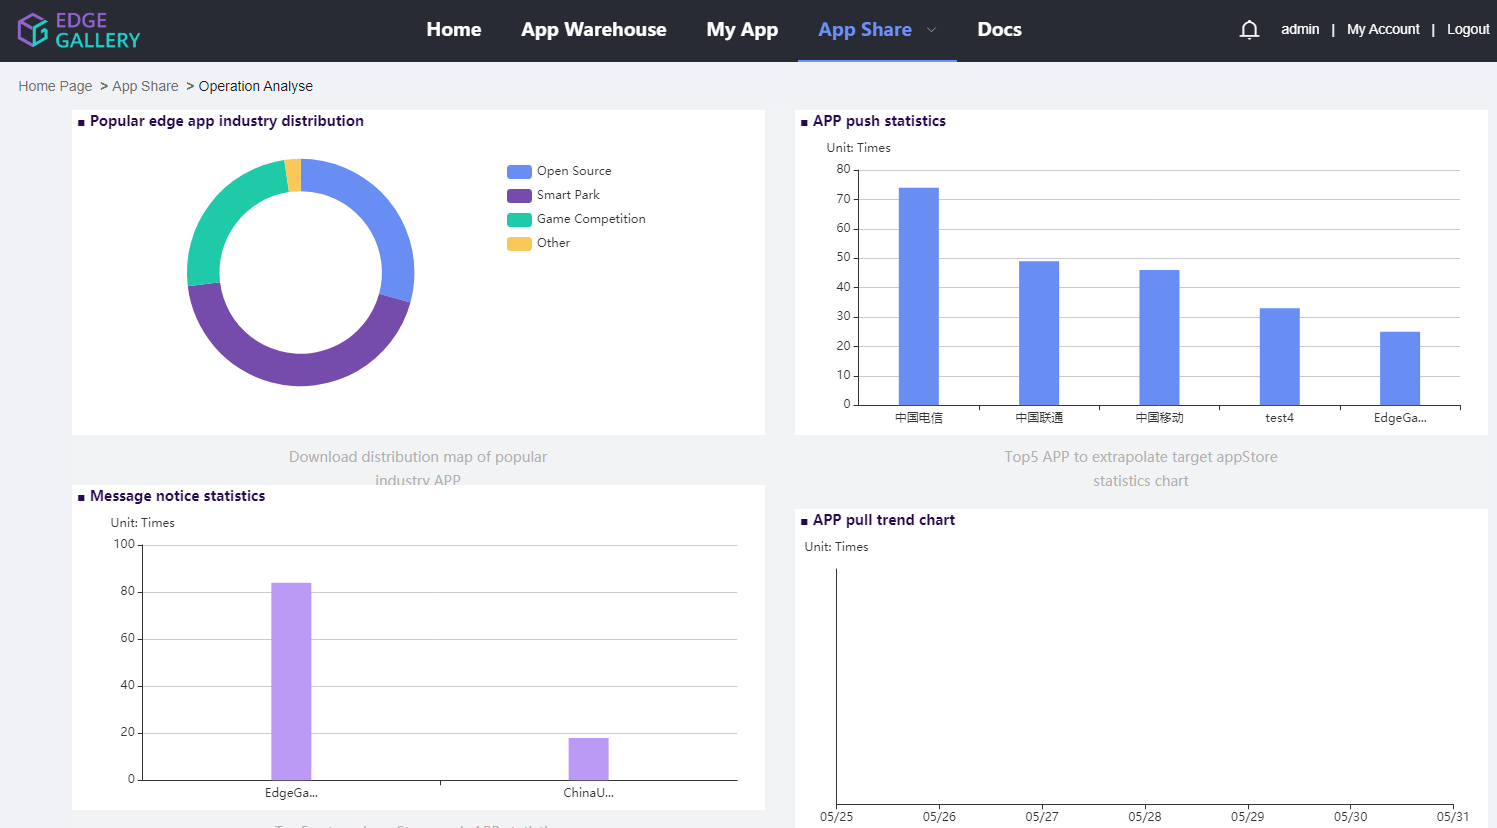
6.After the application is successful, switching to the right operation analysis tab, looking at the corresponding information in the operation analysis interface and operating the analysis interface to look at the messages of different operations such as pulling, downloading, informing, pushing and so on.